How to book video appointments in Clarity Web App?
When it comes to doctor appointments, then video consultation has become a new norm. Most patients want to connect to their likable doctor through Video appointments.
Therefore, we also have implemented the video consultation feature in Clarity app & web-app. Through Clarity Web App, There are 2 sides with which video appointments can be book between Doctor & Patient
One is from Doctor side & the other is from Patient side. Let’s discuss both sides in this detailed post.
#1 Doctor’s Side
Suppose you as a doctor receive video appointments indirectly from emails, calls, messages, offline etc. from your lovely patients.
Then, what will you do? Will you use apps like Meet or Zoom? Naaah!!! They are totally incapable of holding appointments, especially Doctors appointments since they lack seamless connectivity & other useful features which doctors should use.
Here comes the Clarity!! Let's discuss step-by-step on how to book video appointments with Clarity.
Step 1:
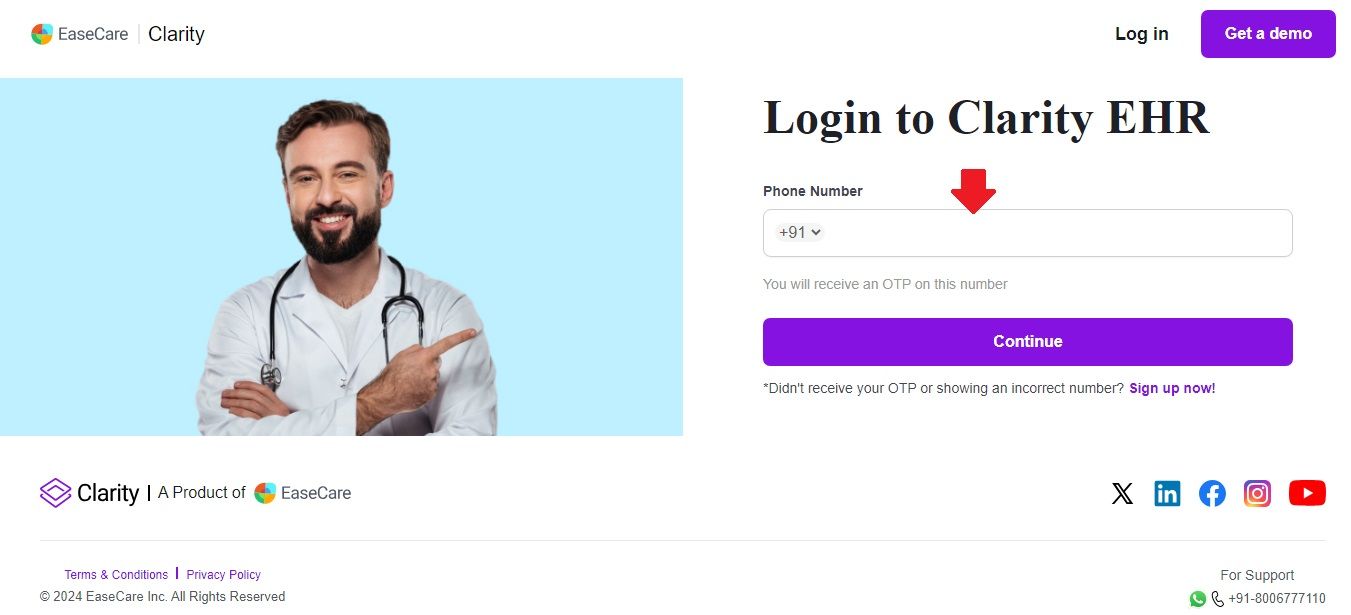
If you already have an account with Clarity then just login to your account. (If not, then know here how to have one? )
Step 2:
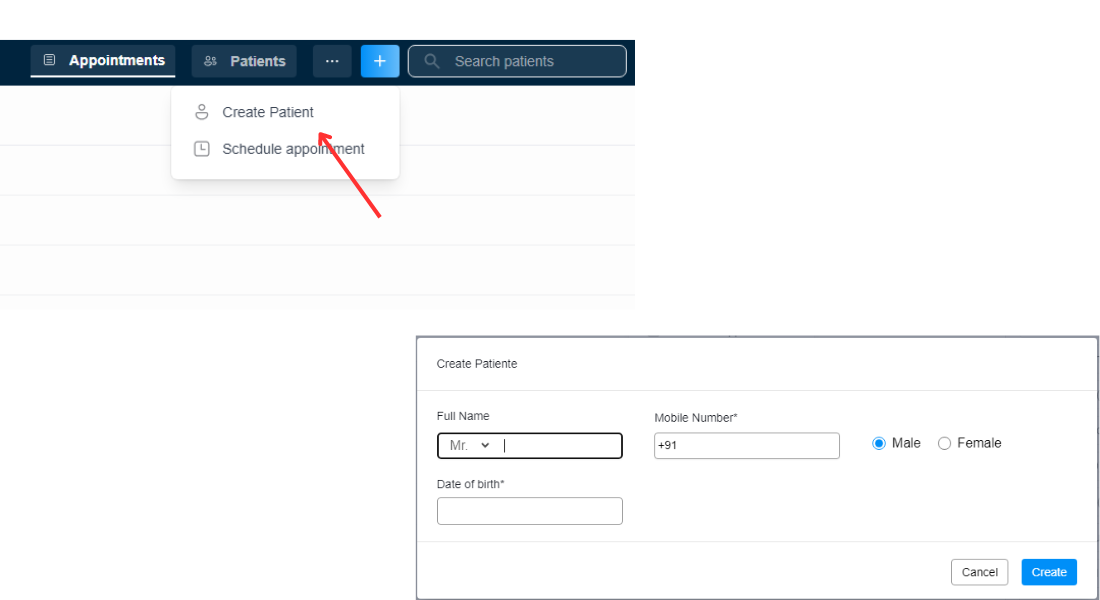
Once you logged in, Create patient first. Just click on the “Create Patient” button on your dashboard & enter the Patient Basic info like Name, Phone Number, Gender, etc.
Step3:
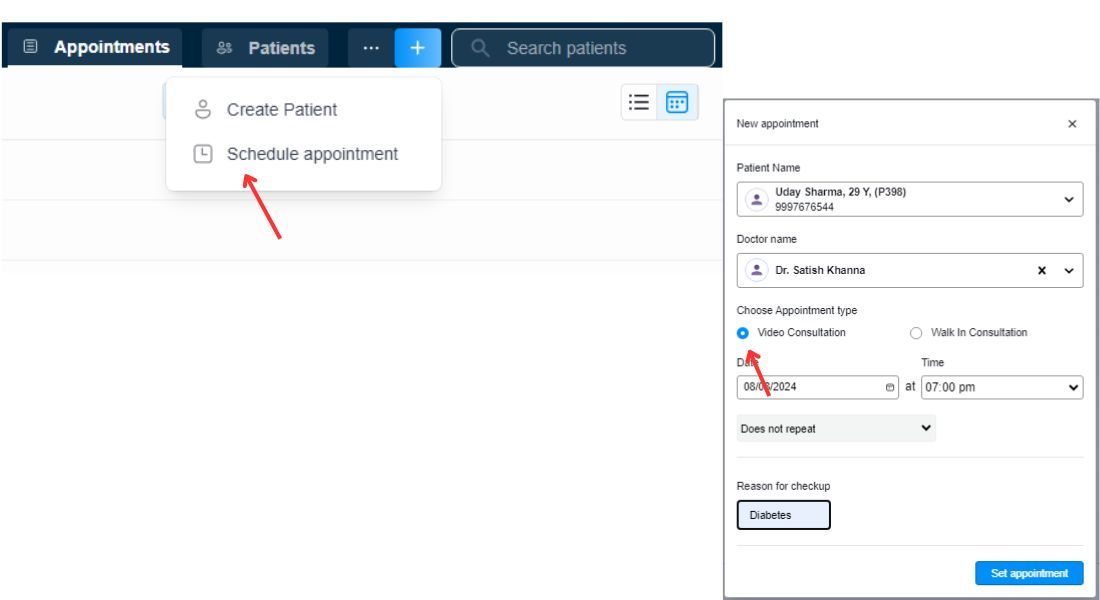
Now, press the “Schedule Appointment” button. Enter all the information related to appointments like Patient, Doctor, Appointment time & date, Reason for checkup, etc.
Just wait, here is a crack. There are two options for appointments just below the Doctor name field; one is Video Consultation & other is Walk in Consultation.
You are smart, just press the Video Consultation option.
Step4:
Just double check all the information is correct & then press the “Set Appointment” button.
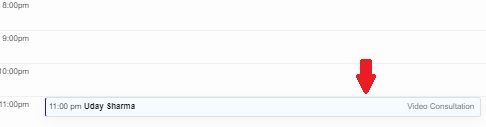
Congratulations! Video Appointment b/w you & the patient have been booked.
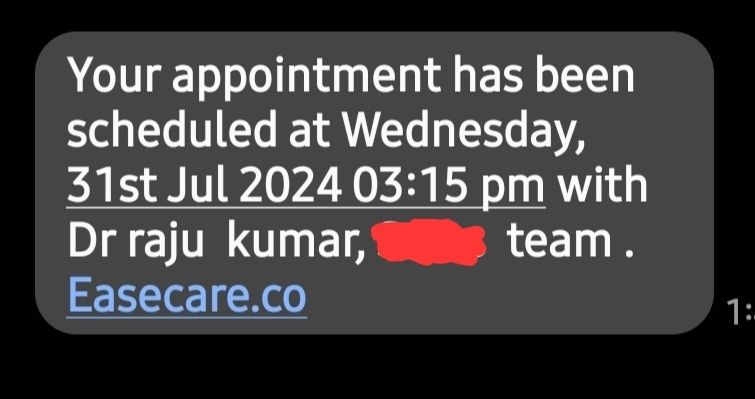
Note: Once an appointment is booked whether a video consultation or walk in consultation, a confirmation SMS is sent to the patient registered mobile number carrying all information related to that appointment.
#2 Patient Side
NOTE: If a patient has your clinic link{available at the top-right of the dashboard} then only he/she can book an appointment.
Let’s discuss step-by-step how a patient can book appointments:
Step1:
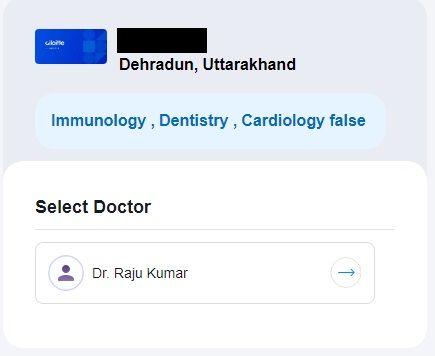
Once your patients visit the clinic link, then they need to select the doctor of your clinic to whom they want to book an appointment.
Step2:
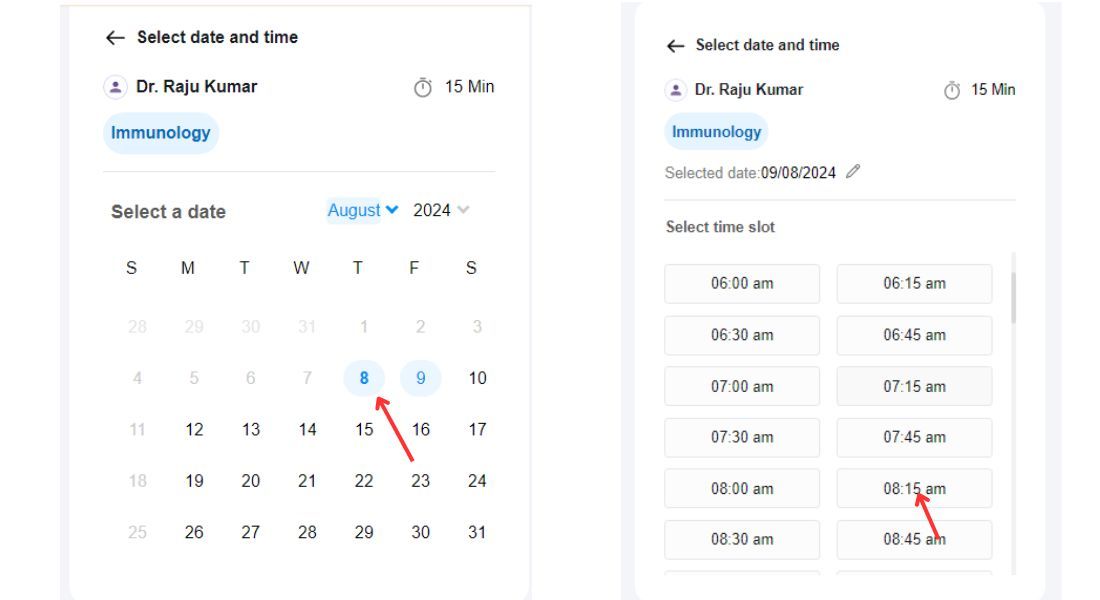
In the next step, patients need to select their date of appointment. Further they need to choose the timing of their appointment.
Step3:
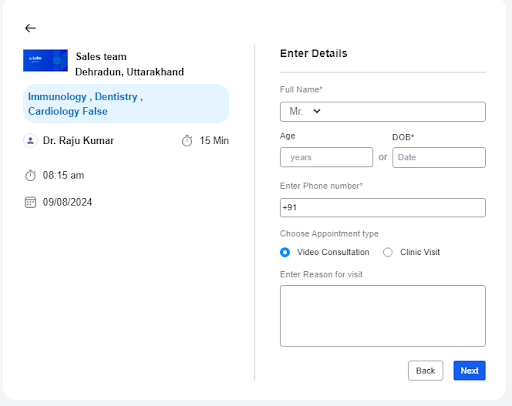
In the final step, patients just need to enter some details like Name, Age or DOB, Phone Number, Appointment Type(Video or Walk In) & Reason to visit.
Verify the details & press the “Next” Button
Congratulations! Appointment has been booked from the Patient Side.
How to hold a Video Appointment with a Patient?
Holding a video appointment is very easy with Clarity. Whether the appointment is booked by Doctor or Patient, the process will be the same.
Whether you booked the appointment or the patient itself booked it through the clinic link, it will finally appear in your dashboard.
Let’s discuss it in three simple steps:
Step1:
For holding a video appointment with a patient, you just need to click on his/her name in your dashboard, a window will pop up.
Step2:

Now you just need to tap the green “Join” button. Then, you will be redirected to a video call hosted by Clarity quick server.
Step3:
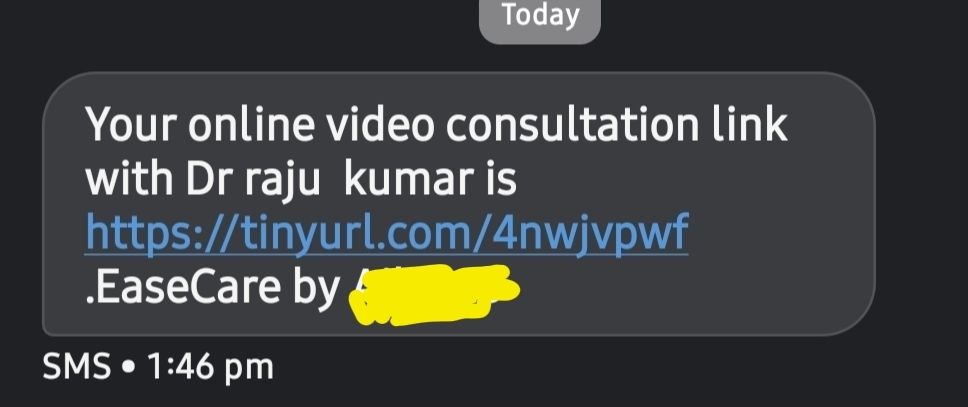
Once you join the video call, an SMS will be sent to the patient with the link of that video appointment. Finally, the patient will join the video appointment via this link.
Also, you can also send the appointment link directly to your customer with the appointment link button in the appointment window.
Congratulations! Now you can interact with your patients without any interruptions.
NOTE: You can also hold video appointments prior to the appointment time with the same process.